Research Note: This post reflects my own experience being tattooed multiple times plus observation of the professional setup process. I’ve also incorporated information from industry sources about safety standards and equipment. I’m sharing the client perspective on what happens during professional tattooing, not an artist’s technical guide.
Before You Even Walk In: The Consultation and Booking
The session itself starts well before you show up. Understanding the booking process saves you stress and helps set proper expectations.
The Consultation
What to expect: Some shops do consultations separately from the tattoo appointment; others combine them. During a consultation, you’ll discuss your idea, placement, sizing, and style with the artist. Bring reference images, but stay open to their input since they know what translates well to skin.
One thing that catches people off guard: the person you consult with may not always be the person who tattoos you. In some shops, a manager or booking coordinator handles consultations, and the actual artist sees the design closer to your appointment date. If it matters to you that the artist is involved from the start, ask about the shop’s process upfront.
Deposits and Cancellation Norms
Deposits are standard. Most shops require a deposit to hold your appointment, typically ranging from $50 to $200 or a percentage of the estimated total. This protects the artist’s time; they’re often turning away other clients for your slot.
What to know about deposits:
- Most deposits are non-refundable but can be applied toward rescheduling (within reason)
- Cancellation policies vary by shop; ask before you pay
- Last-minute no-shows can forfeit your deposit and affect your ability to rebook
- If you need to reschedule, do it as early as possible; a week’s notice is generally respectful, 24-48 hours is the bare minimum
If You Need to Reschedule
Life happens. The key is how you handle it. A polite, honest message to the shop goes a long way. Something like “I need to reschedule due to [reason]; I’m flexible on the new date” is all it takes. Most artists would rather you reschedule than show up sick, stressed, or with damaged skin.
Keep in mind:
- Rescheduling once or twice is normal and understood
- Repeated rescheduling can strain the relationship
- If the artist reschedules on you, the same grace applies both ways
- Your deposit typically carries over for a reschedule but not for a flat cancellation
What You’ll See When You Arrive
Walking into a professional tattoo shop for your appointment, you’ll typically encounter a clean, organized workspace. Good shops prioritize both aesthetics and hygiene.
The setup you should see:
- Clean, well-lit work areas
- Organized stations for each artist
- Visible sterilization equipment
- Clean floors and surfaces
- Proper waste disposal containers
If something looks off—dirty surfaces, disorganized equipment, or concerns about hygiene—trust your instincts. A professional shop should feel professional.
The Pre-Session Process
Paperwork and Identification
Before anything else, most shops require:
Standard paperwork:
- Consent forms
- Medical history questions (allergies, conditions, medications)
- Age verification (ID required)
- Acknowledgment of aftercare instructions
Why it matters: This protects both you and the artist. Medical information helps identify potential issues (blood thinners, allergies, skin conditions). Consent ensures you understand what you’re agreeing to.
Design Review
If you haven’t seen the design before: This is when your artist will show you the design, discuss any modifications, and confirm you’re both aligned on the concept.
What to do:
- Look carefully at the design
- Ask about anything that concerns you
- Request changes if needed (reasonable changes should be accommodated)
- Only proceed when you’re satisfied
Important: This is your last chance for design changes. Once tattooing begins, modifications become much harder.
Stencil Application
For most tattoos, a stencil guides the work:
The process:
- Artist prepares your skin (typically cleaning and possibly shaving the area)
- Stencil is positioned on your body
- You check placement in a mirror
- Adjustments made if needed
- Final approval before proceeding
Placement matters: Take time to evaluate the stencil placement. Consider how it looks from different angles, how it’ll look with various clothing, and whether it flows with your body.
What the Artist Is Doing
Setup and Sterilization
While you’re doing paperwork, the artist is preparing:
Equipment setup:
- Fresh, single-use needles (always new, never reused)
- Ink portions in individual caps
- Barriers on equipment (plastic wrap on frequently touched surfaces)
- Fresh supplies for your session specifically
What you should see:
- Needles opened from sealed packaging in front of you
- Single-use items everywhere they’re practical
- Clean surfaces and barriers
- Gloves worn throughout
Equipment Overview
Main components of a professional setup:
Tattoo machine: The device that drives the needles. Modern machines are either coil (traditional electromagnetic) or rotary (motor-driven). Both work; it’s largely preference.
Needles: Various configurations for different purposes—liners for outlines, shaders for filling, magnums for large areas. All are single-use.
Power supply: Controls the machine’s speed and power.
Inks: Professional-grade tattoo inks in various colors. Quality shops use reputable brands.
Workspace: Clean surface, arm rest or positioning aids, good lighting, comfortable seating for both artist and client.
During the Session
What Tattooing Feels Like
The sensation varies by:
- Body location (some areas hurt more)
- Individual pain tolerance
- Session length
- Your mental state
Generally described as:
- Scratching sensation
- Vibrating discomfort
- Heat in the area
- Ranges from annoying to painful depending on location
What helps:
- Breathing steadily
- Staying hydrated
- Having eaten beforehand
- Distracting yourself (music, conversation)
- Breaks when needed
The Artist’s Process
Typical workflow:
1. Outline first: Most artists begin with the outline (linework), establishing the design’s structure.
2. Shading second: After the outline, shading adds dimension and depth.
3. Color last: If the design includes color, it’s typically added after shading.
4. Final touches: Cleaning up, ensuring saturation, making final adjustments.
Timeline varies: Small pieces might take 30 minutes to an hour. Large, complex work can span multiple sessions over months.
Communication During the Session
Good artists check in regularly:
- Asking about your comfort level
- Explaining what they’re doing
- Offering breaks
- Responding to your needs
What you should communicate:
- If you need a break
- If you’re feeling lightheaded or nauseous
- If something feels wrong
- If you have questions
Don’t suffer in silence. Professional artists expect clients to need breaks and communicate needs.
The Products Used During Tattooing
Tattoo Glide and Barrier Products
During the session, artists use products to:
- Help the machine glide smoothly over skin
- Reduce friction and irritation
- Keep the work area visible
- Protect the stencil
Common products include:
- Petroleum-based products
- Water-based glides
- Specialized tattoo lubricants
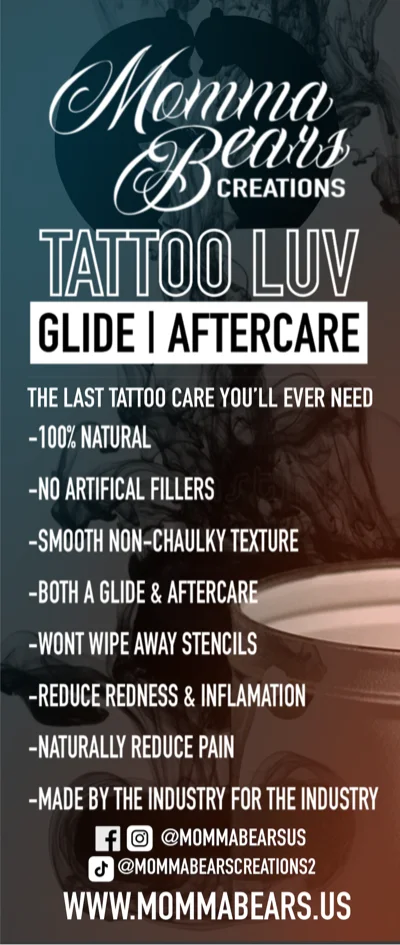
Note: Some artists are particular about the products they use. Tattoo Luv, for example, is a natural glide and aftercare product that some artists prefer because it’s stencil-safe and tube-friendly. (Disclosure: I have a family connection to this product.) There are many options; artists have their preferences based on experience.
Ink Application
How ink gets into skin: The needle punctures the skin rapidly (thousands of times per minute), depositing ink in the dermis layer. The artist controls depth, speed, and saturation.
What you’ll see:
- Artist dipping needles in ink
- Wiping away excess ink and blood
- Building up color gradually
- Checking consistency throughout
Wrapping Up the Session
Final Inspection
When the artist finishes:
- They’ll clean the tattoo
- You’ll look at the completed work
- Final adjustments can be made if needed
- Photos are typically taken (artist portfolio and your records)
Take your time looking. If something concerns you, speak up—it’s easier to address immediately than after you leave.
Bandaging
The tattoo will be covered:
Common approaches:
- Plastic wrap (traditional, short-term)
- Saniderm/Tegaderm (breathable film, can stay on longer)
- Non-stick bandage
Your artist will explain:
- How long to keep the covering on
- When and how to remove it
- What to do immediately after removal
Aftercare Instructions
Before you leave, you should have:
- Written or verbal aftercare instructions
- Product recommendations
- Information about what’s normal vs. concerning
- Contact information for questions
- Touch-up policy explanation
Don’t leave unclear on aftercare. Ask questions if anything is confusing.
What to Expect After
Immediately After
Normal sensations:
- Tenderness in the area
- Redness and swelling
- Warmth
- Similar to a sunburn or scrape
Normal appearance:
- Bright, vibrant colors
- Possible slight bleeding
- Plasma/fluid weeping
- Redness around the tattoo
The Healing Process
Days 1-3:
- Most sensitive and tender
- Bandage removal per artist instructions
- Begin gentle cleaning and moisturizing
Days 4-14:
- Peeling and flaking begins
- Itching is common (don’t scratch!)
- Colors may look dull temporarily
- Continue aftercare routine
Weeks 3-6:
- Surface healing completes
- Skin feels normal again
- Appearance settles
Months 2-3:
- Deep healing finishes
- True healed appearance visible
- Touch-up evaluation appropriate
Questions to Ask
Before the session:
- Can I see the needles being opened?
- What’s your typical session process?
- How do you prefer clients communicate during the session?
During:
- Can I take a break?
- How’s it looking?
- Is this normal? (if something concerns you)
After:
- What aftercare do you recommend specifically?
- When should I be concerned?
- What’s your touch-up policy?
The Bottom Line
Professional tattooing involves careful setup, hygiene protocols, and a methodical process that prioritizes both artistry and safety. Understanding what happens behind the scenes helps you feel prepared and confident.
The key takeaways:
- Good shops are clean and organized
- Single-use items and sterilization are non-negotiable
- Communication with your artist matters
- Take time to approve designs and placement
- Follow aftercare instructions carefully
What questions do you have about the tattoo process? What would you add from your experience? Share in the comments.
Resources
Safety Standards:
- Association of Professional Piercers - Industry safety information
What to Expect:
- Your specific artist’s guidance
- Shop policies and procedures
InkedWith is written by tattoo enthusiasts sharing what we’ve learned from our own experiences getting inked. We’re fellow collectors, not professionals—your artist is your best guide for your specific session.
Recommended Care